 |
|||||||
|
views:
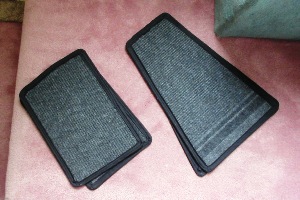
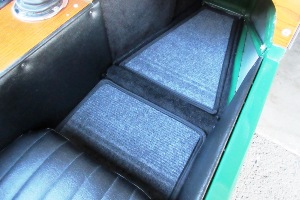
January 31, 2016 As promised, we took a trip down to our local Ace Hardware store last week to look for material we could use for floor mats, something that would protect our brand new luxury automotive carpets from everyday wear and tear. The store didn't have a huge selection, but we did find something with rubber-like material on the bottom and carpet-like material on top, similar to our old Toyota floor mats, and bought a yard of it. A yard turned out to be just slightly short of what we needed, but fortunately the clerk at the store measured wrong and we actually got 38", which was just enough.
After cutting out the four pieces we needed, we bound all of the edges using cloth tape and our newly-acquired carpet binding skills. The end result won't threaten WeatherTech for quality, but at least the mats look like they were made for the car, and they should do an adequate job of protecting the carpets. Although we haven't yet figured out a way to protect the mats. But the cost of materials for the mats was only around $12, and they took only about six hours to make, so maybe we just replace them when they start to wear out, which if we're lucky won't be for at least a couple of months.
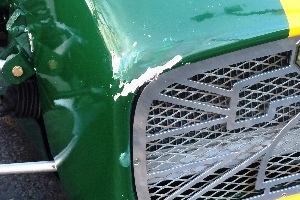
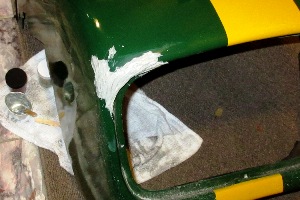
The day after we installed the floor mats, we got into our first accident with the Locost. Nothing major, not even a fender bender, but we did damage the nose cone a bit. Our fault really, for expecting the driver in front of us to be alert and intelligent. We understand that our Locost might be a little difficult to see, but is that really an excuse? We don't think so, especially with our flashy yellow stripe. One of these days we need to fix the steering wheel hub and reconnect the horn. Not that anyone can hear it, but it makes us feel better to lean on it. We were of course discouraged by the accident, the first blemish on our brand new Locost, but two things. 1) The car isn't really new. We've been driving it for over two years now, and we've enjoyed every minute of it. And 2) it's not really the first blemish. We've got chips and dings all over the car. They're all minor, and we've hidden most of them with a touch-up brush, but you can't drive a car for two years the way we've driven our Locost and not get dinged up occasionally. Out on the open road, apexes are full of rocks and bushes and other debris that can attack even the finest paint job. We don't mind if the car looks like it's been driven.
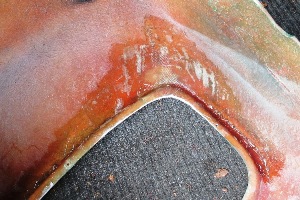
The good news is, we were already planning to repaint the grille, which entailed removing the nose and disassembling it, then painting the grille and waiting for the paint to dry. So we had plenty of time to add another step, where we would epoxy the nose and smooth it out with plastic filler, then paint over the blemish and wait for the paint to dry. Fortunately, we made the decision early on in our build to use standard hardware store Rustoleum on our bodywork, so matching the old paint would be a breeze. Also, Rustoleum brushes on easily and dries to a hard shell finish in just days. The damage to the nose turned out to be a little more than skin deep. We were going to have to reinforce it from the inside with a few layers of fiberglass cloth, something we weren't looking forward to doing because, as you know, fiberglass doesn't like us. We fought with the hood scoop for months, and it still doesn't look good. We thought we might have better luck using polyester resin instead of epoxy, which would seem to go well with our polyester nose, so we took a trip down to our local Tap plastics and bought everything we'd need for the job.
We'd forgotten how easy it is to fiberglass with polyester. People who fiberglass with epoxy look down their noses at people who fiberglass with polyester, as well they should, but the fact is, a rank amateur can get decent results with polyester, and we proved it. Polyester maybe isn't as strong as epoxy, but it's sturdy enough for a Locost nose cone, so long as you don't hit anything. Once the reinforcement on the inside of the nose had cured, we slapped a little epoxy filler paste on the front, filed it all down to the approximate shape of a Locost nose, sanded it smooth, and brushed on paint. Two days later everything was cured and dry. Although not necessarily pretty. Brushed-on paint is not as smooth as, say, sprayed-on paint. It's close though, and somewhere down the road we can always buff it out. The important thing is, as always, it looks okay in photographs, at least from the right angles. The paint is sufficiently glossy, and you could even make an argument the nose looks good as new, "new" in this case not being a terribly high standard, the nose having suffered a couple of cracks early on when we first installed our slightly-oversized aluminum radiator.
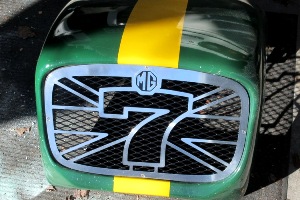
Painting the grille was uneventful, although we're not sure how long the paint will last. At one point we considered getting it powder coated. On our drive to work we pass an industrial park where for the past two years a hand-lettered sign with the words "powder coating" and an arrow pointing to a small shop in back sat alongside a narrow driveway. A shop like that seemed perfect for a job like our grille, but last month the crude little sign was gone, replaced by a much larger, colorful, professionally-painted billboard. So obviously the shop has grown too big for us. So we painted the grille ourselves with black Rustoleum wheel paint, which we figure must be pretty strong and chip-resistant if it works on wheels, although probably not. But at least for now the new grille looks great in our repaired nose, almost as good as our new floor mats, darkening the inlet and highlighting our unique 7-style grille motif. Of course we don't really know what a motif is, but it sounds classy, and that piece of aluminum framework took us a long time to make and we'll call it whatever we want.
While we had the grille apart, we polished up the aforementioned motif using some kind of chemicals that rapidly dissolved the adhesive gluing our M.G. badge in place. So we replaced it with a reproduction badge for some kind of early M.G. sedan that we ordered by mistake a few years ago. The new badge actually has a little more classic look to it than our old badge, in a flat sort of way, so we're pretty happy with it for now, although it's made out of some kind of cheap vinyl and obviously won't last very long. Maybe we'll order a couple more. Painting the grille reduces by one our list of tasks that we're trying to get completed before the Bay Area Maker Faire in May. Next up is finding a way to hide the tangle of wires sticking out from behind the dash. This is mostly on the passenger side, so it's never really bothered us, but we've had complaints. Not that the wires pose any kind of threat or danger, we're pretty sure, but they are unsightly. We'll take a look and see we can just zip-tie them to something, otherwise we may have to install a new cardboard panel. |
About Our Locost Please Note: Our database is currently unavailable so you will not be able to browse through log entries. This happens sometimes, and it usually doesn't last long. We're sorry for the incovenience. Please try again later. Or in a few minutes. | ||||||
 Home
Home
