 |
||||||
|
views:
June 5, 2013
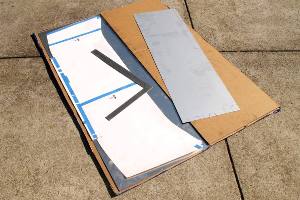
As promised, we started working on the body panels. Or at least we cut them out. Or not actually cut them out, but you know, marked the lines for cutting them out. Cutting and bending the panels should be easy, in part because we gained valuable experience from making the hood (a.k.a. bonnet), and mostly because we're using a lot thinner aluminum than we used for the hood. The sheet metal for the rear panel is only 1/32" thick, which is barely thick enough to stop a bug, but it'll be in the back of the car where bug impacts are rare.
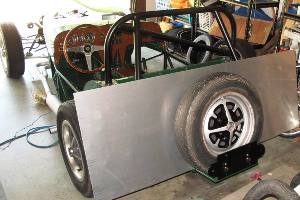
Although we didn't actually cut anything out yet, we did set the rear panel on the car to get an idea what it would look like. Right now it looks kind of wide. It should start to look better after we've bent it around the tubes. It does show off our spare tire nicely, though. A week ago we decided to give the rusty old Rostyle a fresh two-tone paint job, just to get an idea of what it would take to paint all four wheels. What it took was hours of relentless wire-brushing, hours of tedious masking, and days waiting for paint to dry. So we've now decided the other four wheels look pretty darn good as is.
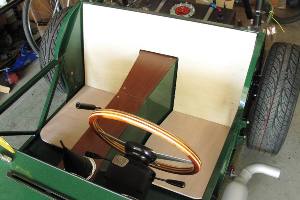
While we were stalling around on the body panels, we finished the seats. Not "finished" finished of course, but close enough. We haven't actually covered them yet, so right now they're basically just sheets of plywood, and not all that comfortable, but they're all done and bolted in, which was the hard part. We went with the traditional bench type seats, which consist of a single seat back and separate seat bottoms. We weren't exactly sure how big to make them, and they turned out kind of large. We hope they still fit when they're all vinyl covered and puffy.
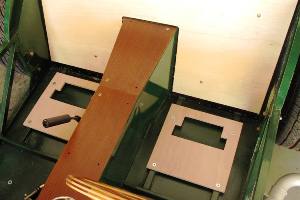
Our biggest issue with the seats all along was how we'd mount them to the seat rails, something we clearly didn't give enough thought to when we made the seat rails. We came up with something that appears to work, but it's a little difficult to describe. Seat bottoms are basically two parts, a base with a hole in it that bolts to the rails, and the seat itself which has a tab that locks into the hole in the base, and another tab that bolts to the chassis cross rail. Like we said, hard to describe. Maybe the pictures will help. Although probably not.
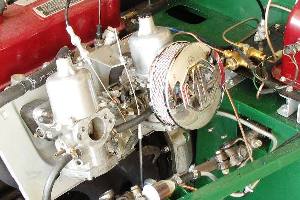
We bought a couple more parts from Moss Motors, including some electrical bits and a pair of blingy low-profile air cleaners. There's no way the standard MGB air filter canisters were going to fit under the Locost hood, even with major surgery, so we needed something smaller. I'm not sure we needed something this bright. But we did try placing the hood on the car to see if the new filters would fit, and of course they didn't, so it looks like we're going to have to cut away a little more aluminum. But we're actually okay with that. Weight savings. Surprising as it may seem, the vast majority of Locosts have an air filter or two sticking out of the hood. You don't really notice it, but it's extremely common, approaching something like 80%. We didn't believe it either, so we checked it out, and everywhere we looked, exposed air filters. Even the picture of a random Locost on our home page—exposed air filter. So it turns out if you're really good at building cars, you can maybe fit all of your engine under the hood, but the air filter? Unlikely. We've actually got quite a few other things that we can work on now. We got our headlight assemblies from Speedway Motors, and we now know our headlight bar is all wrong, so we'll have to strip that back to bare metal, and do some drilling and cutting and maybe even some welding before we repaint it. We also bought some stainless steel for the muffler heat shield. The Locost book is surprisingly clear on how to build this piece, and once we figure out how to bend the big perforated sheet into a "suitably curved" cylinder, the rest should be easy. So we've been pretty busy this week, but we plan to get started on the bodywork for real in the next day or two. Or at least sometime this month. The good news is we're down to just 43 tasks and 206 hours in our coachwork countdown, which puts us on a pace to finish by our original July 26th deadline, so long as we can find a way to shave about 40 hours off that estimate. Or maybe a little more. |
About Our Locost Please Note: Our database is currently unavailable so you will not be able to browse through log entries. This happens sometimes, and it usually doesn't last long. We're sorry for the incovenience. Please try again later. Or in a few minutes. | |||||
 Home
Home
