 |
||||
|
views:
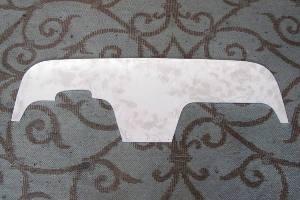
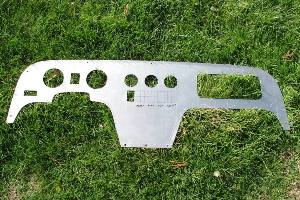
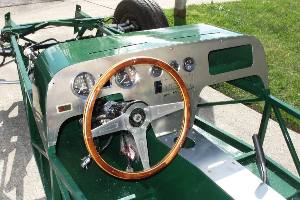
March 27, 2013 Our old metal supplier finally came through with the 0.10 6061-T6 aluminum, and we now have a real dashboard instead of a flimsy cardboard mock-up. It took some time to cut the thing out with our little scroll saw, and even more time to file all the edges smooth, but it ended up close to the right size and shape based on how well it fits the scuttle.
We had to add a couple of new sizes to our borrowed collection of circle-cutter saws, a 2" and a 3-1/8", which made perfect holes for the instruments. Cutting square holes for the switches and oil pressure gauge wasn't quite as hard as we expected, but we only cut one switch hole, because we only have one switch right now, for the headlights. We plan to have five switches altogether, and we hope they'll all be the same size, even if we're not sure yet what we'll use them for. Probably a fan switch, and maybe a defrost, and I guess two more just for looks. Unfortunately, it turns out MGB switches are much bigger than your standard Ford or Chevy rocker switch, so you can't just plug in your basic $5 switch from Summit Racing. MGB switches from Moss Motors run about $19 apiece, so that's close to $80 just to fill up our dashboard, plus tax and shipping, which is why we haven't cut any more switch holes in our dashboard yet. Maybe someday when we're feeling a little more flush.
We did cut a hole for the glove box. If we'd left it for later, we might've never done it. Surprisingly few Locosts have glove boxes, and we think the reason for that is because the builder figured it was something he or she could do after the car was running, and then conveniently forgot about it. With a big gaping hole in the dash, we're unlikely to forget about it. We'll at least have to build a door. We saved the latch mechanism from the donor, so we'll be able to open the door with the ignition key, even if there's no actual box behind it. So the dashboard is more or less done, and we like the way it looks in bare aluminum, but we'll probably cover it eventually with wood veneer, which was the style for cars like this back in the sixties. Some Locost builders do the engine-turned thing, which is fairly easy to do with a drill press and a wooden dowel, but engine-turned aluminum looks to us more like something out of the 1920's or 1930's, and not the more modern era of the Lotus 7 and the MGB. Wood was definitely cool back then. Cutting out the dashboard and cutting all the holes for the switches and dials accounted for two separate steps on our engine-start countdown, so that leaves us with 51 steps and 98 hours to go. I know that still sounds like a lot, but once we get to steps like filling the master cylinder with brake fluid, things should start moving right along. Even the way we do things, filling the brake reservoir can't take more than half an hour. 45 minutes, tops.
Right now the scuttle is holding things up. We could finish up the brakes this week, and get all the pedals installed, if we could just bolt the scuttle on permanently. But it looks bad, so we can't. Every attempt to paint the thing has met with mixed results, and by "mixed" we actually mean terrible. Parts of the scuttle look great, really shiny and smooth. Other parts look shiny and crinkly. The scuttle looks okay in pictures, but someday we'll have to take the car out in public, and that might not go so well. The problem is, we lack the kind of patience that you need to do a really good paint job. We do better on small parts, which you can sand in a few minutes, and which dry pretty fast after you rinse them off. The scuttle takes a good hour or two to dry, or at least that's what we estimate since we've never actually waited that long. The last coat we sprayed, the thing looked dry, but air pressure from the paint spray found a hidden pocket of water and laid a fine mist onto our tacky finish, and the paint dried crinkly. So we'll try it one more time, and maybe this time we'll let it dry overnight, and if we still can't get it shiny and smooth everywhere, we'll let it go until we get around to painting all the other bodywork, which we might simply leave to the experts at Maaco. |
About Our Locost Please Note: Our database is currently unavailable so you will not be able to browse through log entries. This happens sometimes, and it usually doesn't last long. We're sorry for the incovenience. Please try again later. Or in a few minutes. | |||
 Home
Home


