 |
|||||
|
views:
February 2, 2013 Building a Locost is sometimes described as building a kit car, after first building the kit. Some kit cars are more complete than others, but the one thing they mostly all claim is that you don't have to do any welding. All you have to do is bolt a lot of stuff together. Few car kits contain every piece you need to need to finish the car, so you still have to do some scrounging, but the pieces they do supply are usually all welded up. If you go by that criteria, then we've built our kit. After we welded the sheeting onto our scuttle yesterday, we hung up our welding gloves and put away our helmet. Good thing, too. We're down to a few hundred psi of C-25, and that 11 lb. roll of filler wire we hoped would go the distance is looking mighty thin.
The sheeting on the scuttle turned out okay, though we may like it less after it's painted. We started out by making a template using construction paper, and then carefully cut a sheet of 20 gauge to match. Somehow, after all that, the sheet metal fit perfectly. It even bent around the curves perfectly. The only thing it didn't do perfectly was weld. It's not like there's anything wrong with the actual quality or appearance of the welds, but the sheeting is no longer completely flat, which is a well-known side effect of welding.
The sheeting isn't lumpy so much as it is wavy, like a mid-sixties Corvette. You can't really see it in the pictures, and actually you can't easily see it in person, but it's there, and we're betting it'll show up in the shiny new paint. If it turns out really bad we can always fix it after the car is done, but I don't think it's going to be really bad. Just kind of bad. But it doesn't matter, because as we've said before, shiny is all we're really going for, and based on that the scuttle is done, and we're more than happy with it.
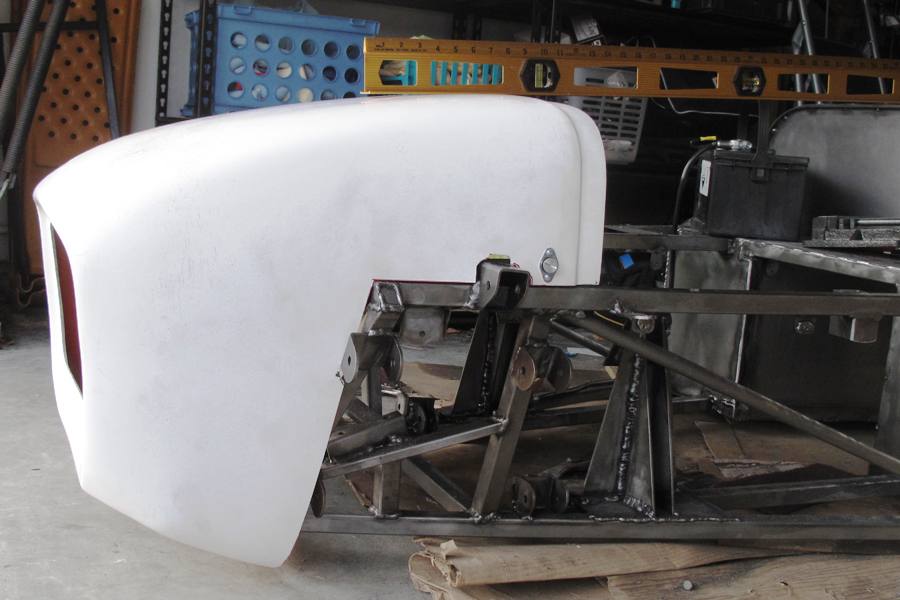
On a much more positive note, we fixed the alignment problem with the hood and the nose. When we first got our nose cone, we were a little concerned that the back edge of the nose wasn't at the same angle as the hood. It didn't look promising. We weren't sure what to do about it, but some kind of fiberglass work seemed inevitable. However, it turned out to be a lot simpler. We just cut the sides of the nose and tilted it forward. The grill now sits down low, like a proper sports car, and the new angle of the nose matches the hood line exactly.
Our very last structural welding job was attaching the upper seat belt mounts to the roll bar. These were probably our best welds ever. We beveled the edges of the brackets beforehand, and when we welded them on the puddle flowed through the beveled area perfectly. We remember starting our welding journey early last year with the spacers on the rear suspension link brackets. We were rookies back then, total novices. Now it feels like we've graduated, and the seat belt brackets were our final exam. I think we got a C. Maybe a C-plus. Grading on a curve. Try as we might, we can't think of anything left on the Locost that might require welding. No tubes, no brackets, no tabs. We don't have all the parts we need to finish the car yet, but as we noted, that's not really a criteria for a kit. We do know exactly what we still need to get, and all of it will be bolted, riveted, or strapped on. We'll have to drill some holes and pull some rivets, but from here on out, nothing on the car gets melted. One thing most car kits supply that we don't have yet is a body. The Locost body comprises eight pieces of metal and/or fiberglass, 12 if you count the fenders, and we have two, the nose and the scuttle. So we're not quite there yet, but the remaining six pieces are pretty simple, and relatively small. Early on in the build we were a little intimidated by the thought of forming all those body panels. But back then we were also concerned with how good they'd look. Not so much these days. We'll do our best and live with it. Hey, it's our first car. We definitely picked a bad time of year to finish up our Locost kit. It's never gotten warmer than about 55 degrees Fahrenheit in the garage, and that was only for an hour or two in the afternoon. We've managed to paint a few loose items by bringing the part and the paint into the house to warm up, and then running outside to shoot it. But that's not a lot of fun, and it won't really work for the frame. So we're still waiting. |
About Our Locost Please Note: Our database is currently unavailable so you will not be able to browse through log entries. This happens sometimes, and it usually doesn't last long. We're sorry for the incovenience. Please try again later. Or in a few minutes. | ||||


 Home
Home