 |
|||||
|
views:
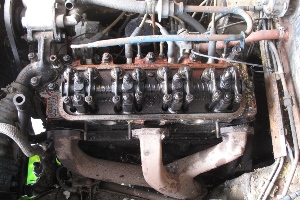
January 19, 2012 Based on a couple of posts over at the Locost USA forum, we decided not to trust to luck that the donor engine would start on the first try once it was bolted into the Locost. Better to get it running in the M.G., we thought. So we went ahead and pulled the head to check the engine internals, which is a really simple task on an M.G. Back in the day we could have the head off an MGB in an hour. This time it took two, but there's a lot more junk bolted to the engine in the post-emissions era. And we're a little rusty.
The good news is, almost all the nuts and bolts came off really easily. Although we still haven't managed to separate the thermostat housing from the head. There's some kind of bluish glue-like substance oozing out from under the flange, so that piece might need a little extra persuasion. The spark plugs look a tad black, which either means the engine was running slightly rich, or else tan electrodes turn black after many years of neglect. The valves have a little bit of carbon baked on, not bad though. No evidence of cracks in the head or any burnt valves.
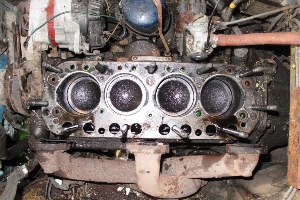
Inside the engine, the cylinder walls were mirror-smooth, but kind of dry, especially toward the bottom, which was expected. We bumped the engine by pushing the car with the transmission in gear, and the pistons moved easily, great news on two fronts because it proves conclusively that the drivetrain works. We ran some oil around the cylinder walls and left that to soak into the rings. A quick peek under the distributor cap revealed an intact rotor and no serious crud, so we're confident once we put everything together the car will start.
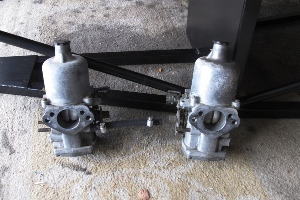
The S.U. carburetors weren't the old HS4s that we used to work on, but being a later design they should work better, or at least that's what we'd like to believe. They're similar to HS4s, but with more tubes running out of them, most likely for some kind of emissions purpose, and built-in float bowls. They looked okay, but the chokes on both carbs were glued shut. We're guessing the culprit was varnish, which we think is automotive speak for dried-up petrol. In any case, copious amounts of WD-40 sprayed in and about the choke mechanisms eventually freed them up. There are about a million vacuum lines running around the engine bay, or if not a million then at least half a dozen, and since the car needs exactly one, for the timing advance (brakes are unboosted), we have to believe the rest are there in a futile attempt to clean up the exhaust. Of course we'll have to remember to put them all back in place exactly how we found them. Because while pre-1975 cars aren't tested for emissions in California, they are still required to have all of their original emissions equipment installed and operating, and it could be illegal for us to suggest we might do otherwise.
We're not going to replace too much on the engine at this point, at least until we know for sure that something isn't working. We did order a new thermostat, which we'll install if we can ever pry the housing loose. Replacing coolant hoses would be a waste, since the stock hoses won't work on the Locost. The carburetor heat shield had cracked, been tack welded, and cracked again, so we repaired it with a strip of 18 gauge steel and a couple of pop rivets, then painted it with silver Engine Enamel. And everything will be getting new gaskets. Except maybe the thermostat housing. |
About Our Locost Please Note: Our database is currently unavailable so you will not be able to browse through log entries. This happens sometimes, and it usually doesn't last long. We're sorry for the incovenience. Please try again later. Or in a few minutes. | ||||
 Home
Home


