 |
||||||
|
views:
August 18, 2013
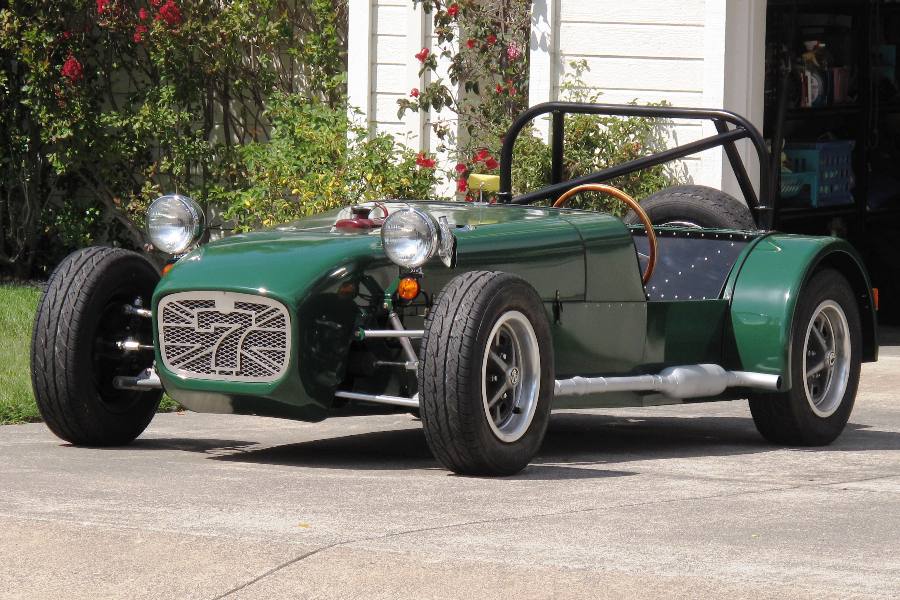
The bodywork is done. Everything's painted and attached to the car. We still can't quite believe it, and it's a big shock every time we open the garage door and see this shiny sports car sitting inside. It looks way better than we ever expected, and it's not just the bodywork. The headlights, taillights, grill, and spare tire all add to the finished look. The air cleaners we thought were way too blingy for our build now blend perfectly with the glossy hood. The beading around the rear fenders looks almost professional.
We attached the body panels with lots of black silicone caulk. We went through the better part of two 10 oz. cartridges, and most of it's underneath the panels, out of sight. Of course we are not experts with a caulking gun, and some of it oozed out. We don't see this as a serious problem, in part because it's black and doesn't show except up close, and in part because it looks at least like we made an honest effort to use lots of sealant. This late in the game, we're not concerned about the extra weight.
None of the panels was particularly difficult to install, and riveting wasn't as much work as we were led to believe. A lot of Locost builders spring for an air riveter, but really, fewer than 500 rivets all told, and only the side panels got really boring. The biggest issue was getting all the rivets in before the caulking dried, although our borrowed set of clecos helped a lot in that regard, although we now need to find a way to clean dried caulking off clecos before we have to return the set to my brother. I'm sure there's a solvent out there.
We didn't fully attach the rear fenders, because it turns out we're going to have to remove them so we can install the shocks. The fender flanges cover most of the upper shock bolts, and while it might be possible to get a wrench on the bolts with the rear fenders in place, it won't be possible to withdraw the bolts from the brackets. Also, the 3/8" holes in the brackets have to be drilled out to 12 mm or 1/2", depending on which shocks we get, and we'd just as soon avoid using a drill that close to our new bodywork.
Now that the body is permanently attached we were able to install the exhaust for the last time and fire up the engine. It's been a while, but the car still runs great and sounds excellent. Oil pressure and coolant temps are all normal, even with our semi-restrictive winter grill in place. We ordered stainless steel straps to attach the heat shield to the exhaust, but they haven't arrived yet and we're starting to like the way the exhaust looks without it. Yes, it's a safety issue, but I'm sure we can learn not to touch the hot muffler, in much the same way we learned not to touch the hot stove. We can't claim to be completely done with the coachwork because we haven't attached our front fenders yet. Or built them. Or even really designed them. But it's the middle of August so we have to move on. Front fenders will therefore be kicked into the final phase of this project, which we're calling Getting it Registered. Also moving into the final phase will be the shocks and driveshaft, which didn't really belong in Coachwork in the first place, but will almost certainly be needed to register the car. So our coachwork countdown didn't work out quite as well as our engine-start countdown. We ended up with 14 steps and 46 hours remaining, although in our defense we started with a lot more, and we also did quite a few tasks that weren't even on the checklist, like for instance the lights and the grill. So on balance I think we came out even. Or maybe even a little ahead. Hard to tell since our goal was kind of fuzzy to begin with. The important thing is, we're still on schedule for a mid-October completion date. Or thereabouts. |
About Our Locost Please Note: Our database is currently unavailable so you will not be able to browse through log entries. This happens sometimes, and it usually doesn't last long. We're sorry for the incovenience. Please try again later. Or in a few minutes. | |||||


 Home
Home