 |
||||
|
views:
January 17, 2013 We made a slight mistake on the dashboard mount for our scuttle, basically rendering it useless, which I guess is more than a slight mistake. The thing is, our chassis is 42" wide, so naturally anyone building a mount for the dashboard would make it 42" wide. Unless they happened to measure it first, and found the scuttle is only 41-5/8" wide where the dashboard attaches to it. Unfortunately that didn't happen for us, and as per our usual policy we won't be divulging the name of the person who decided not to measure anything. We were able to reuse the 1/8" strip that formed the top of the hoop by grinding away the 16 gauge sheet that was welded to it, and then re-bending it slightly. It's not pretty anymore, but it'll be welded over and completely hidden under the scuttle for its entire life, so no one will ever know. We did have to order a whole new sheet of 16 gauge steel, but it was only, like, $28 so not our most expensive blunder to date. As a bonus we now have a large stock of 16 gauge steel on hand in case we get the urge to make more brackets or tabs.
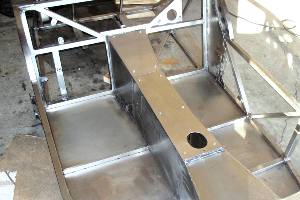
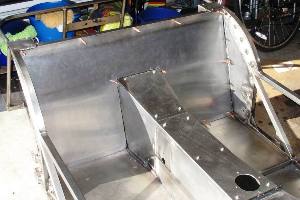
Our aluminum finally arrived and we were able to cut out and fit the console covers. This turned out to be a lot less exciting than we anticipated, mainly because the covers were kind of flat and plain. We could maybe add something to spruce them up, like for instance an ashtray, but we don't smoke. Cup holders, maybe. The covers are 0.10" thick 6061-T6 aluminum, so you can lean on them pretty good without worrying about bending them. The only tricky part about making them was getting the screw holes to line up, but we managed somehow. We also cut out the rear bulkhead. That was a little more exciting, but not necessarily in a good way. First we had to do a lot of grinding and filing on the frame so the bulkhead would lie flat. Stupid weld beads. Then we had to cut out a cardboard template for the bulkhead, because cutting the aluminum directly from frame measurements would be foolhardy, even for us. Then, after carefully cutting the aluminum to match our template, we still had to do a lot of trimming in the corners, which of course took all day. The bulkhead is made out of .050" thick 6061-T6 aluminum, half as thick as the console covers, but that's okay because we only expect to lean on it half as much. Working with this alloy of aluminum isn't all that different from working with steel. It's a little softer and files down faster, but it doesn't bend any easier, something we found out the hard way.
We marked all the rivet holes on the bulkhead with a Sharpie, and there's a lot of them, even with our 2" spacing. We drilled a few of the holes around the perimeter so we could cleco the bulkhead to the frame and make sure everything fits, but we stopped at 14 holes because a) We want to wait until the frame is painted before we drill any more holes in it, and b) We broke our 1/8" drill bit trying to get it to bend at the right angle while drilling in a tight corner. We may go through a few of those 1/8" drill bits. The Locost is looking more and more like a car every day. The rear bulkhead really adds to that effect, and we have to admit the console covers helped too. We've been a little worried about running out of stuff to work on if we couldn't get the frame painted, but so far that hasn't been a problem. The scuttle still needs about 10 hours, the seat belt brackets have to be welded to the roll bar, and there's the whole dashboard thing. So we're not too worried.
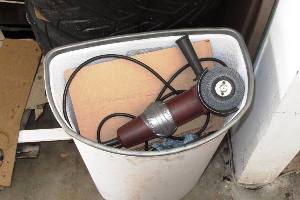
By far our biggest disappointment this past week was the demise of our venerable Harbor Freight angle grinder. It almost made it. Very little metal remains to be cut, and we have only a few things left on the chassis to sand down. We coaxed the grinder along as best we could, but it kept overheating and the new brushes we installed three months ago were quickly deteriorating. We could get it to run at maybe half speed by banging the thing against a frame rail, but it would soon get too hot and slow to a crawl. So we broke down and bought a new one. Not at Harbor Freight of course. The new one cost only $30 more than the HF grinder, which doesn't sound like a lot until you consider the HF grinder was only $20. Anyway, we really liked our HF grinder, and we only wish there was some way we could let the Indonesian kid who assembled the thing for 25 cents know how much we appreciated her work. And that we hope by now she's learned to stick the fan on a little better. |
About Our Locost Please Note: Our database is currently unavailable so you will not be able to browse through log entries. This happens sometimes, and it usually doesn't last long. We're sorry for the incovenience. Please try again later. Or in a few minutes. | |||
 Home
Home


